About HTTP Public Key Pinning (HPKP)
January 30, 2019 | C#, Networks Security, Node.Js, Security, SSL/TLS | 2 Comments
Hey there, today we are going to see how we can implement a HTTP Public Key Pinning (HPKP) in just a few simple steps, to ensure the protection of the data that are transmitted from an app to another.
The main reason to use this kind of implementation is to protect users or apps from man-in-the-middle (MITM) attacks. A MITM attack can happen if the attacker uses a fraudulent certificate to create a spoofed site or server in order to harvest the data that should otherwise are destined for the original server.
So in the following example we will see how to implement a server that uses SSL/TLS using Node.Js and client written in C# (Console Application) to demonstrate the process. The mindset behind this process is the same, so if you want to use another programming language there will be no significant differences.
So thew first thing to do it to create a folder for our Node.Js project. Then (having Node and npm installed) inside this folder, open a terminal and run the npm init command. This will create the the package.json file of our project.

After that we must add the entry point for our server. We create a file named index.js and add the following code which creates a simple server with Express.js a Node.js web application framework.

But in order to our server to work, we have to add some npm pacakges. First we add the package of express, by running npm install express. That also adds some other packages as dependencies to express. Next, If you run your code using node index.js, a server will be created and run on localhost:3000.
The next part has to do with adding SSL/TLS support to our server. We modify our code so it would look like the following. Don’t forget to run npm install https to add the https package.

In order to provide the server.key and server.crt, we must have OpenSSL installed in our system. You can install it from here. Then by running some simple commands, we create the desired files.
- openssl req -new -newkey rsa:2048 -nodes -out server.csr -keyout server.key
- openssl x509 -signkey server.key -in server.csr -req -days 365 -out server.crt
After that, we create a folder named build inside our projects directory and a sub-folder inside it named certs, in order to add the previously server.key and server.crt created files. (The public key can be exported from .crt file and will be used later in the C# app)
If we re-run the server now by adding https:// in front of the URL, we can see the server is responding, with all traffic encrypted (Because of the self signed certificate an error might occur, but we can bypass it).
Next, we will create out console app, to check the communication with our server. This procedure can be used for any other type of application.
Using Visual Studio 2017, create a Console Application You ca use .Net Framework or .Net Core. In the Program.cs file, add the following code.

This will give us the ability to perform a GET request to our server. If the response is a success status code, a message will be displayed.
If you run the app, the GET request will probably fail, and the following error will occur.


This happens because the certificate that is provided is not signed by a Trusted Third Party, so the system cannot trust our server. We will now, add the server certificate and “pin” it to our app, so every request will be encrypted and trust of our server can be established.
To add the certificate just add the server.crt into the project’s root directory and change Copy to Output Directory to Copy if newer.

Additionally, we add a variable for the public key and two methods, one to read the certificate and export the public key, and one to perform the validation when the request will happen with the use of the public key string variable.

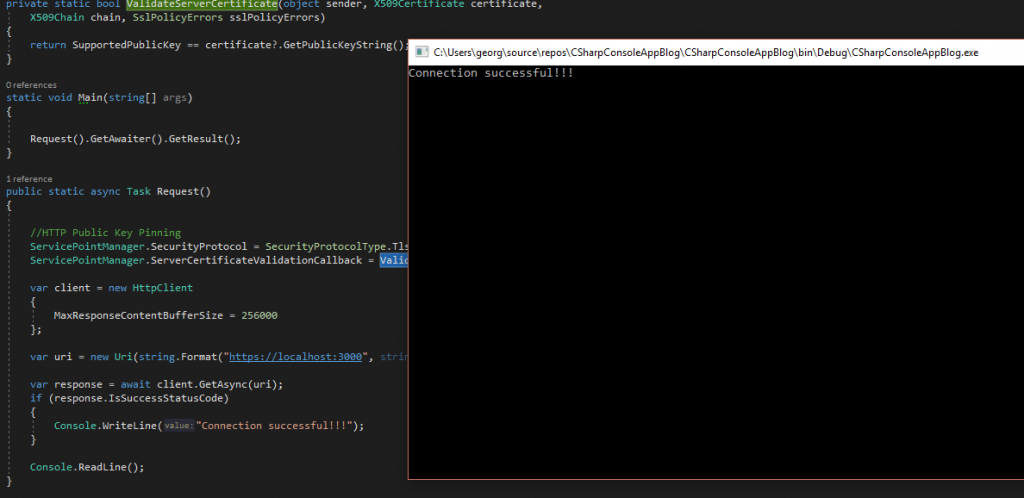
Then, add make the Service Point Manager – which creates and returns a ServicePoint object that contains connection information for the host and scheme identified by the URI and checks for connection errors too- to call ValidateServerCertificate method and when we rerun our console app, the output will contain a successful message.


So thanks for reading, hope that i provided some useful information for this subject. You can find the code for the tutorial and here
Please share your comments and feedback and also check my other posts and let me what you think or what you would like to see next! 😀

