Hello all, a few months ago I was going to present into a local event during the Global Azure Bootcamp 2019 in Athens, Greece. The main topic of the presentation was how you can use Azure IoT Hub in the industrial sector. I thought it would be a nice approach to use Python considering that is an easy programming language that almost everyone that has some programming experience can follow without any difficulties, thus that Microsoft has an Python SDK for IoT hub. The issue that I encountered was that my Ubuntu 18.04 operating system was using Python 2.7.15 and Python 3.6.8, so when I was trying to download the appropriate packages through pip some compatibility errors where raised, not letting me move forward. After many hours of trial and error and searching, I gave up and used the NodeJs SDK since I had already installed the same version of NodeJs in my system.
This problem make me think that there must be a way to install programs, packages and frameworks into an alternate environment, by not making changes in the host system or spending hours fixing potential issues regarding the dependencies of each project. Of course there are Virtual Machine (VMs) but for most system the resource consumption reduces the productivity of developers especially on large projects. After some research and remembering my previous occupation with Docker, I tried to investigate that option.
In this blog post we are going to create a portable, reusable and simple in development environment based on Docker by using Python as our programming language and Visual Studio Code as our editor.
(NOTICE: This is not going to be a step-to-step introduction to docker neither to any of its components like volumes, networks etc. For more info about these topics, see the links at the end of this post)
The example scenario that we will investigate consists of a Python file that reads the databases’ names that exists in the MySQL RDBMS.
First of all, we need docker and docker-compose installed in our host system. Information about how to install both of them in different Operating Systems can be found in this link: https://docs.docker.com/compose/install/. We will also need Visual Studio Code (VS Code) as our editor/IDE, that can be found here: https://code.visualstudio.com/download
Once the installation of both docker and VS Code has finished, we open VS Code and create a folder that will include out project. Additionally, some extensions must be installed in order to make the debugging process more efficient and less painless. By going to the left menu, on the Extensions option we search for Docker and Remote – Containers and we install both of them.


After that, we create a file named docker-compose.yml. This file will contain all our services that we can later deploy with a single command. In our example scenario the first thing we should specify is the MySQL database. By going to DockerHub (https://hub.docker.com/_/mysql ) we can find the snipped on how to create the MySQL container from the ready image that exists there. We copy this example and paste it in our docker-compose.yml file as shown below:

Create a .env file also in order to include our secrets for the MySQL container configuration. Docker compose will automatically search for a .env file when it sees the variable symbol (${…}) inside the docker-compose file.
Furthermore, we need a python container to run our actual code. By relaying again to ready images from the docker hub, this time we will create a Dockerfile instead of putting configuration directly to the docker-compose.yml. We create and folder named app inside our main project’s folder and we include the Dockerfile. We also add the main.py file that will run our code, a requirements.txt file for the Python packages and a copy of the .env file so we could be able to connect to the database once the container runs.

For our simple proof-of-concept code we just include a connection with the MySQL and a command that returns the name of each individual database that exists. The packages in the top of the main.py can be found inside the requirements txt.


Now we are ready to include the configuration for the python container in our docker-compose.yml. We simply add the context of our demo-app, a name, we expose the same port that was included in the Dockerfile and we assign the same network as we did with the database so these two could communicate.
And here we are, our environment is setup! We can open a CLI now and test that everything runs as we want. By running the command docker-compose down && docker-compose build && docker-compose up -d we delete any previous containers, we build the containers from the images include in the docker-compose file and we run them in the background. We can verify that our containers are up and running by typing docker ps in the CLI.


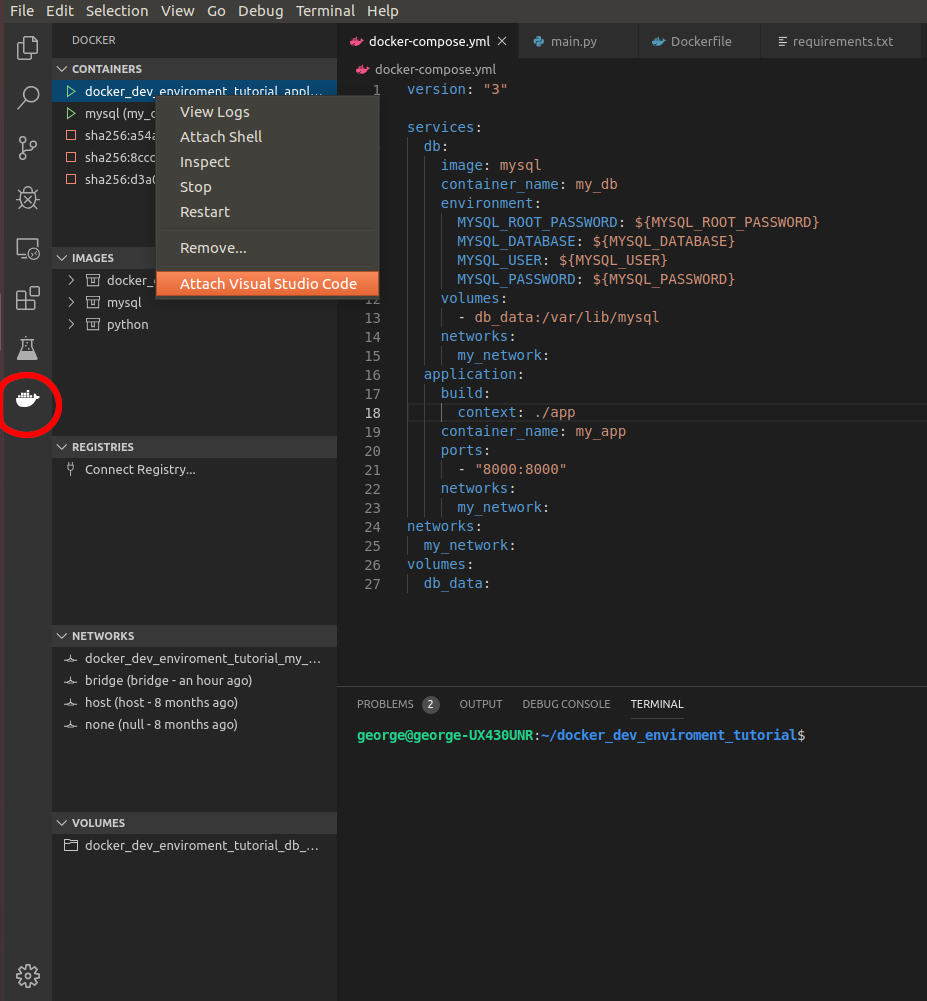
Now we want to be able to debug our app and check for potential issues in our codes or just to inspect the flow of our code. To do that we go to the docker extension we installed in the beginning and find out python container named my_app. Then right click the container and select Attach Visual Studio Code as shown in the image below.
This will open a new VS Code window where the extension will instantiate a connection with the selected container. If we click on the notification to the right bottom of the window, we should see something similar to following:
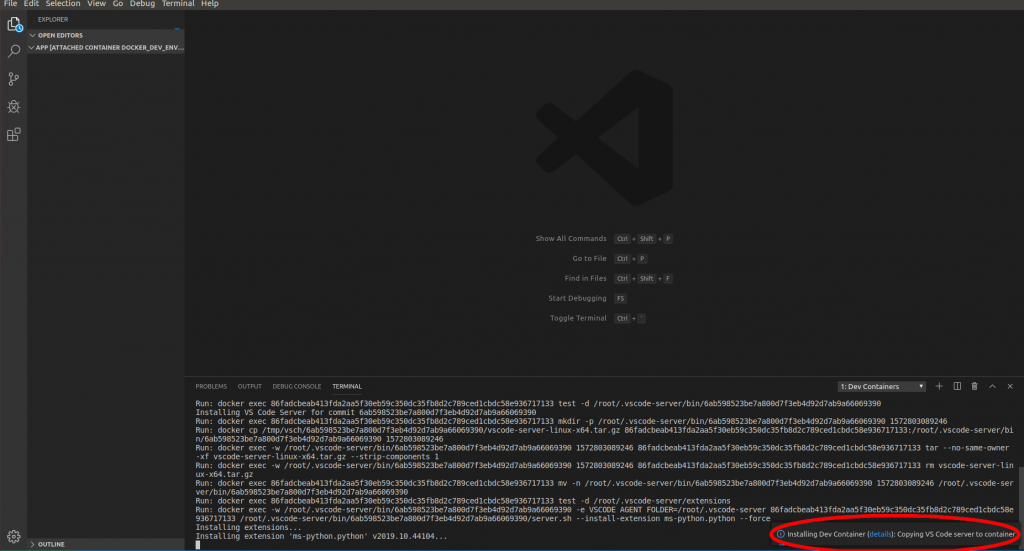
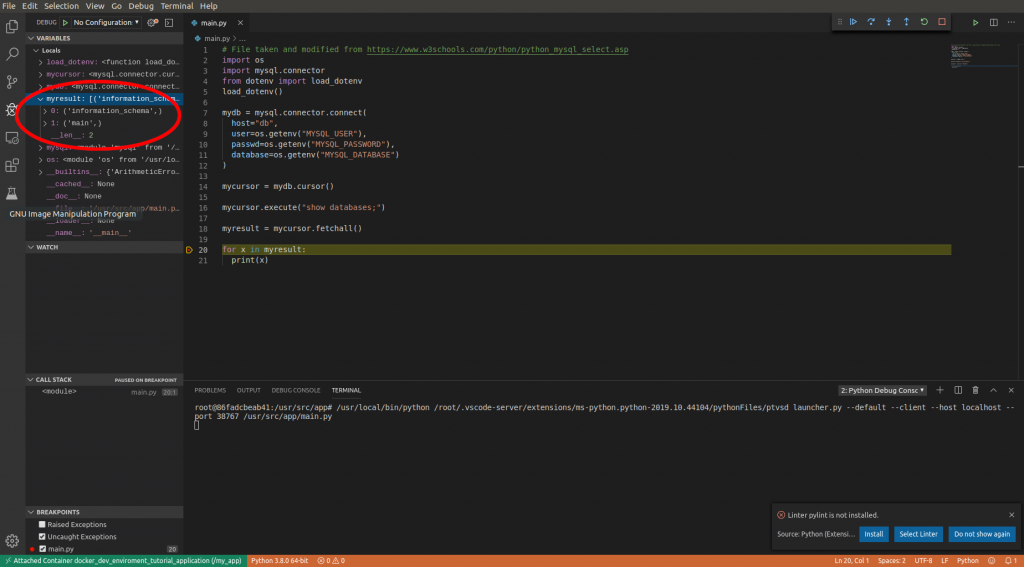
We can then set a breakpoint any where inside our main.py file and go to Debug –> Start Debugging or the press the F5 button and voilà! We can now debug our app inside the container!
So that’s it. With some simple steps we have created an isolated and reusable across the whole team development environment. You can find the code and all the configuration files for the tutorial and here
Please share your questions, comments, concerns and also check my other posts! Let me what you think or what you would like to see next! 😀
Other useful resources:
https://docs.docker.com/storage/volumes/
https://docs.docker.com/network/
https://www.linux.com/tutorials/docker-volumes-and-networks-compose/
https://docker-curriculum.com/
