Hello guys, after a long long time i found some spare time to write a blog about one of my favorite subjects as a developer. The RESTful APIs.
Today we are going to see how easy is to create an RESTful API that demonstrates a messaging service using Visual Studio, C# and Postman.
The image below shows the basic design of the app (and every basic RESTful service.)

So, let’s get started:
- In Visual Studio, select File –> New –> Project and then choose the ASP.NET Core Web Application (.NET Core). Name the app as you wish (i named it MessageWebApi).
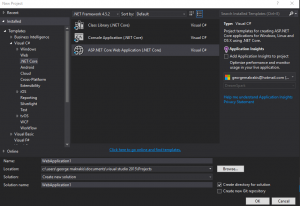
The next window prompts us to choose some options. We choose Web Api.
If we run our up after the project initialize, the default browser of our system will show us something like this:

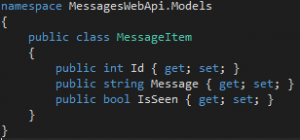
- Next we will add a folder. In Solution Explorer, right-click the project and choose Add –> New Folder. Name the folder Models. This folder contains classes-objects that represent the data in the app. In this point we will only ad one class for our messages. Right-click the Models folder and select Add –> Class and enter the name MessageItem. Use the following code snippet for this class.
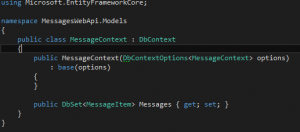
- After that we create the database context which is the main class that gives Entity Framework the functionality of our model. Again right-click the Models folder and select Add –> Class nad name the class as MessageConxtext. Inside the clas we do the following:
- Also we need to make some registration for our database so the context be available to all controllers. To do that we go to Startup.cs file and make the following changes:

The DefaultConnection string must be implemented insode appsetting.json (Don’t forget to change the name of your own DB in Database value)

Also the Database must be created otherwise some exceptions will occur during the run-time. - The most important step is to add a controller. If you are familiar with MVC architecture you cant understand easily. If not check the MVC architecture patterns on the web to get some idea of the controller functionality.
Our controller can be creatd by right-clicking the Controllers folder, select Add > New Item and in the Add New Item dialog, select the Web API Controller Class template. as shown below:
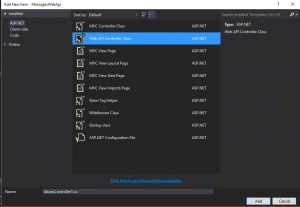
We replace the code inside with the following snippets:
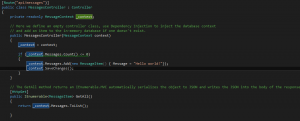
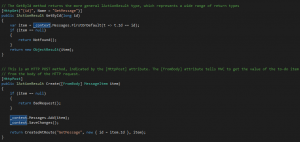
The we run the app using the play button or CTRL+F5. - Now we will implement the other CRUD operations.
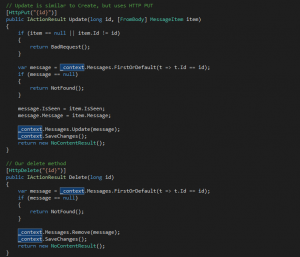
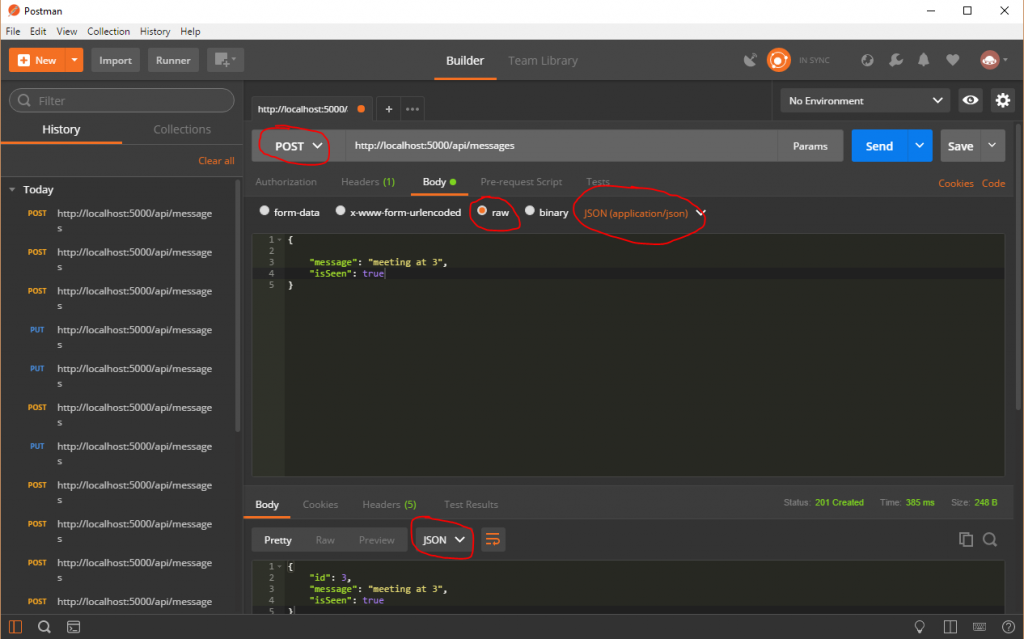
- The last thing is to download and install Postman and test our brand new Web Api. We send all the request as raw JSON files but we can also use the other options that Postman gives us.
Run the app and then make a request like the one below:
I hope that you you found this post interesting. The whole sample project is here: https://github.com/georgemakrakis/MessagingWebAPI
Please let me know your thoughts and you proposals for improvements in comments. Thank you!!! 😀
